本文参考实战营提供的教程:Tutorial/docs/L2/Lagent/readme.md at camp3 · InternLM/Tutorial (github.com)
基础任务:
- 使用 Lagent 自定义一个智能体,并使用 Lagent Web Demo 成功部署与调用
1 Lagent 介绍
Lagent 是一个轻量级开源智能体框架,旨在让用户可以高效地构建基于大语言模型的智能体。同时它也提供了一些典型工具以增强大语言模型的能力。
其基本架构如下所示:
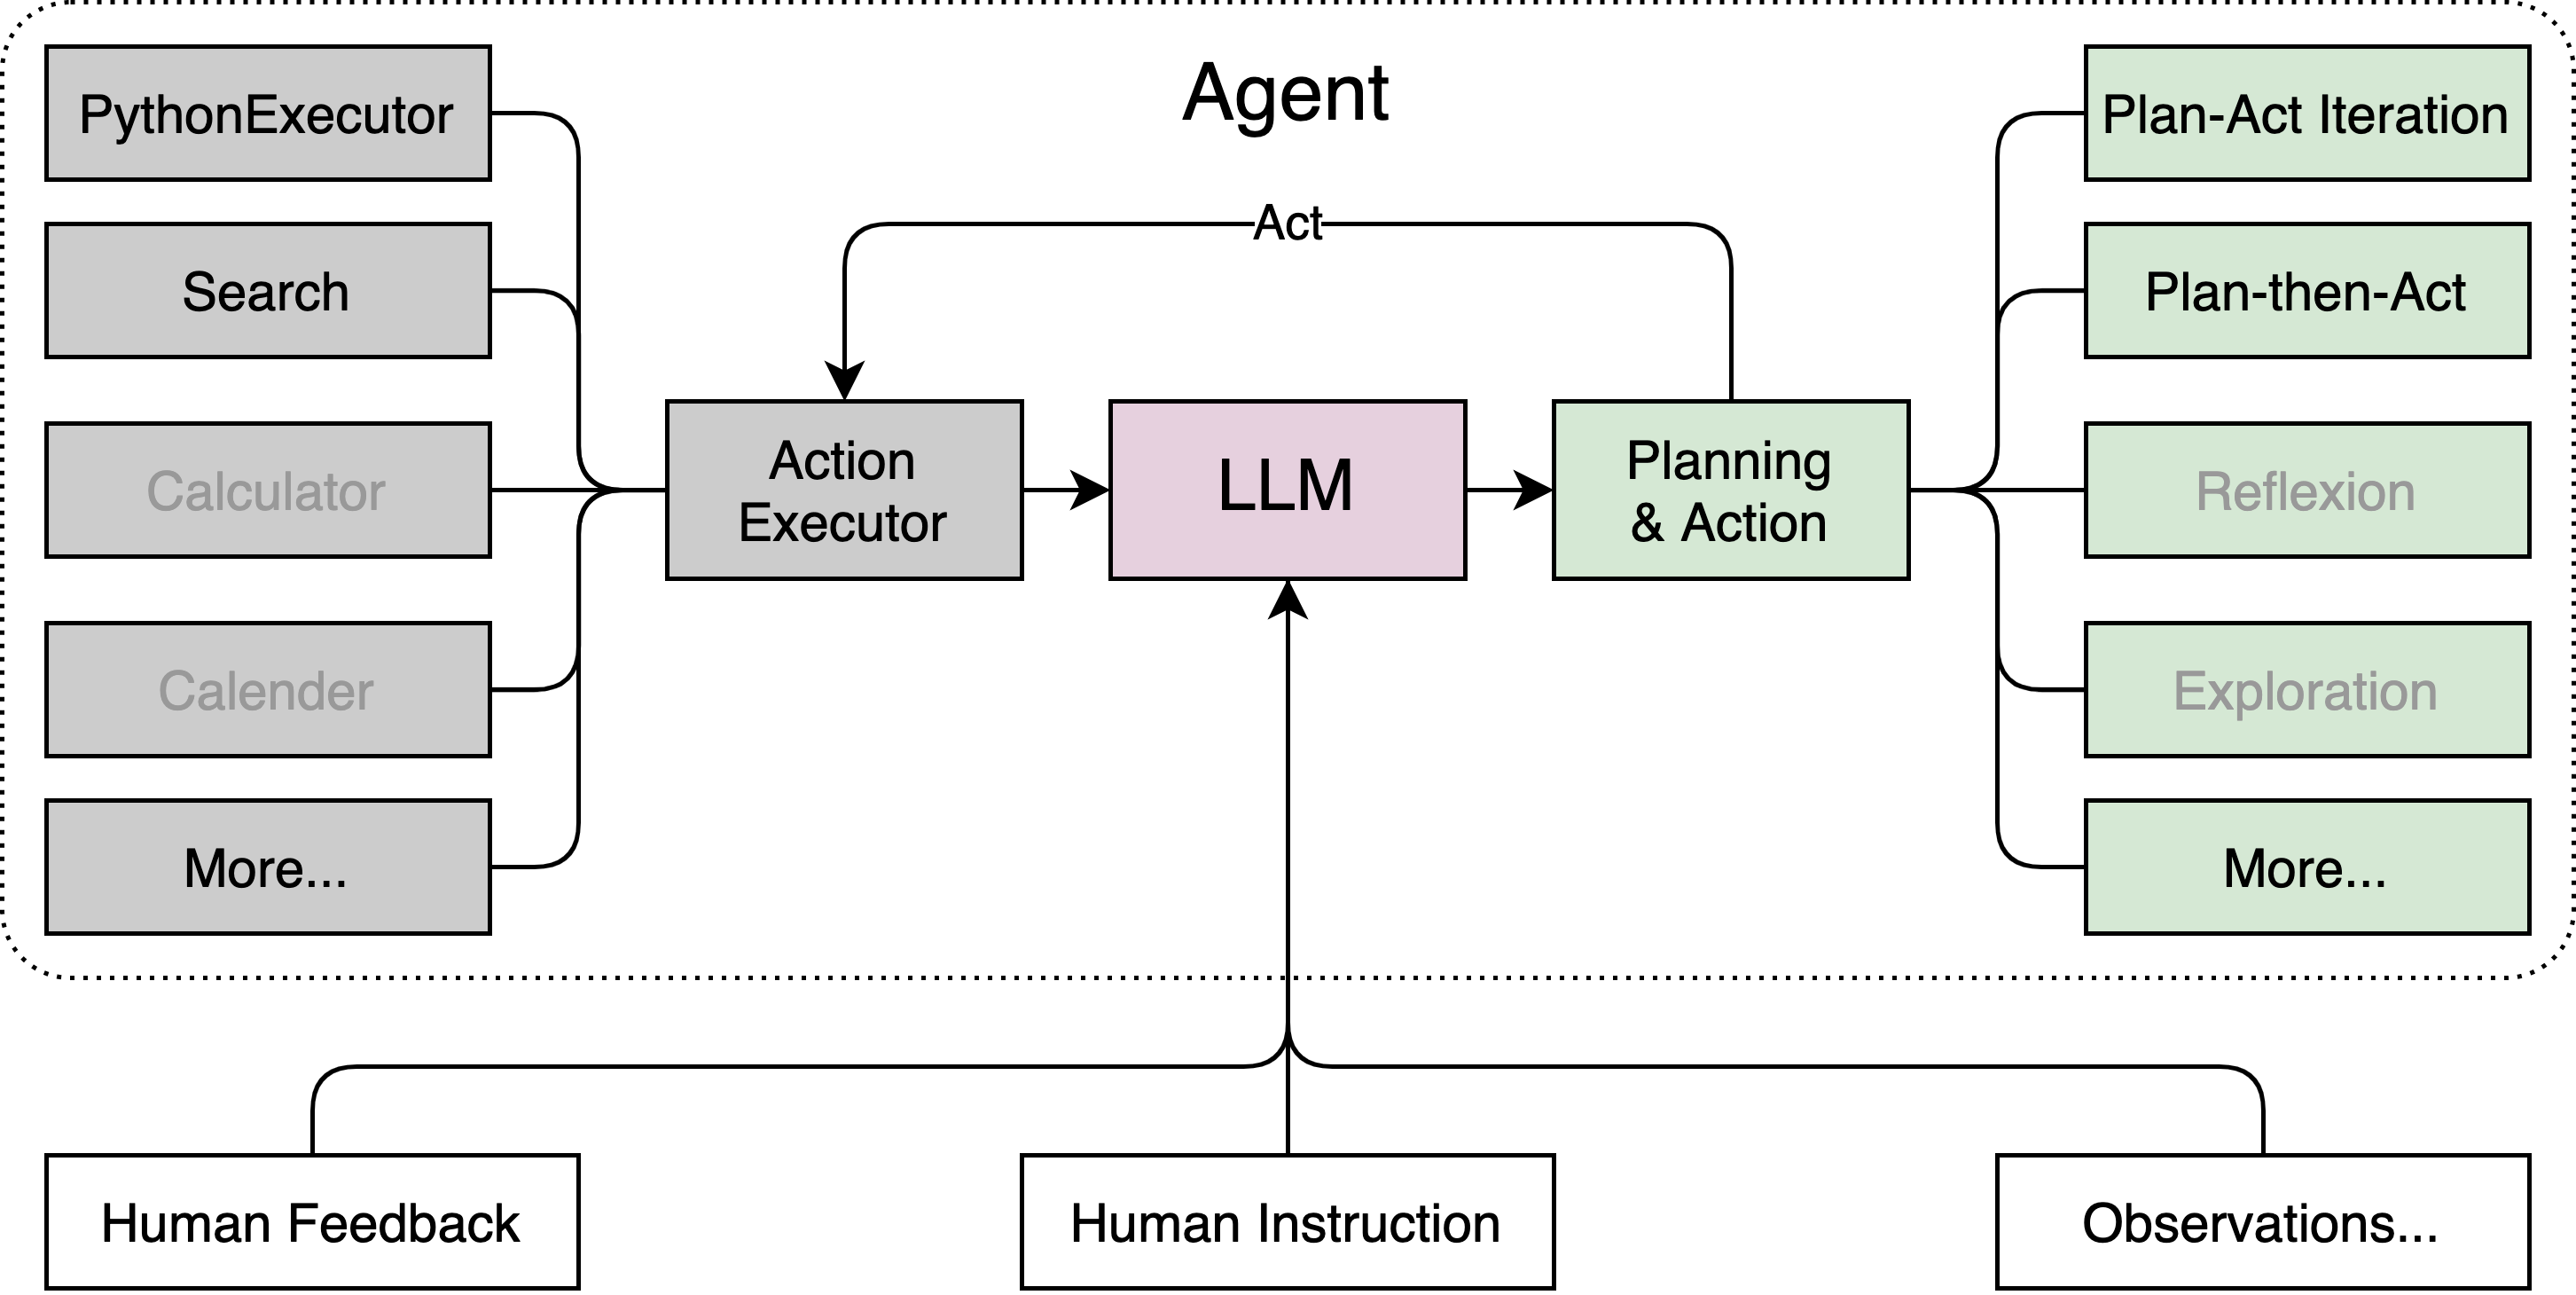
Lagent 包含三个主要模块:agents,llms 和 actions。
- agents 实现了多种智能体,如 ReAct,AutoGPT。
- llms 支持多种大语言模型,包括在 HuggingFace 上托管的开源模型(Llama-2, InterLM)及 GPT3.5/4 等闭源模型。
- actions 包含一系列工具,并提供工具执行器来统一管理。
2 环境配置
首先来为 Lagent 配置一个可用的环境。
# 创建环境
conda create -n agent_camp3 python=3.10 -y
# 激活环境
conda activate agent_camp3
# 安装 torch
conda install pytorch==2.1.2 torchvision==0.16.2 torchaudio==2.1.2 pytorch-cuda=12.1 -c pytorch -c nvidia -y
# 安装其他依赖包
pip install termcolor==2.4.0
pip install lmdeploy==0.5.2
接下来,我们通过源码安装的方式安装 lagent。
# 创建目录以存放代码
mkdir -p /root/agent_camp3
cd /root/agent_camp3
git clone https://github.com/InternLM/lagent.git
cd lagent && git checkout 81e7ace && pip install -e . && cd ..
3 Lagent Web Demo 使用
首先,我们先使用 LMDeploy 部署 InternLM2.5-7B-Chat,并启动一个 API Server。
conda activate agent_camp3
lmdeploy serve api_server /share/new_models/Shanghai_AI_Laboratory/internlm2_5-7b-chat --model-name internlm2_5-7b-chat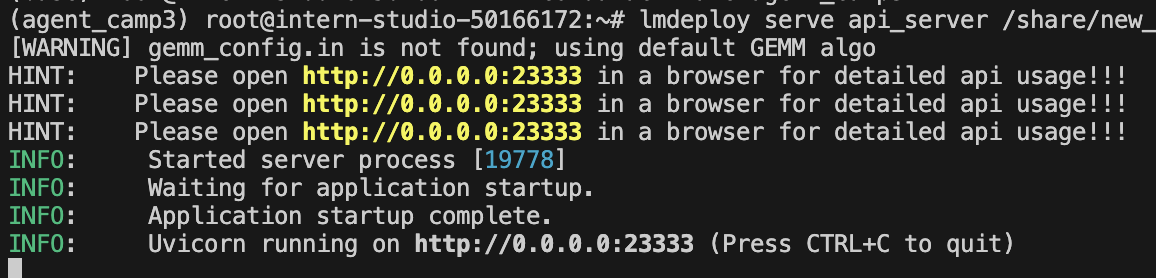
启动服务后,我们需要在另一个窗口启动 Lagent 的 Web Demo,命令如下:
cd /root/agent_camp3/lagent
conda activate agent_camp3
streamlit run examples/internlm2_agent_web_demo.py
由于我们使用vscode,其会自动帮我们进行端口映射
需要注意的是,这里直接按文档流程会遇到
ModuleNotFoundError: No module named 'griffe.enumerations'的问题,原因是griffe的版本过高,需要安装低版本pip install griffe==0.48。
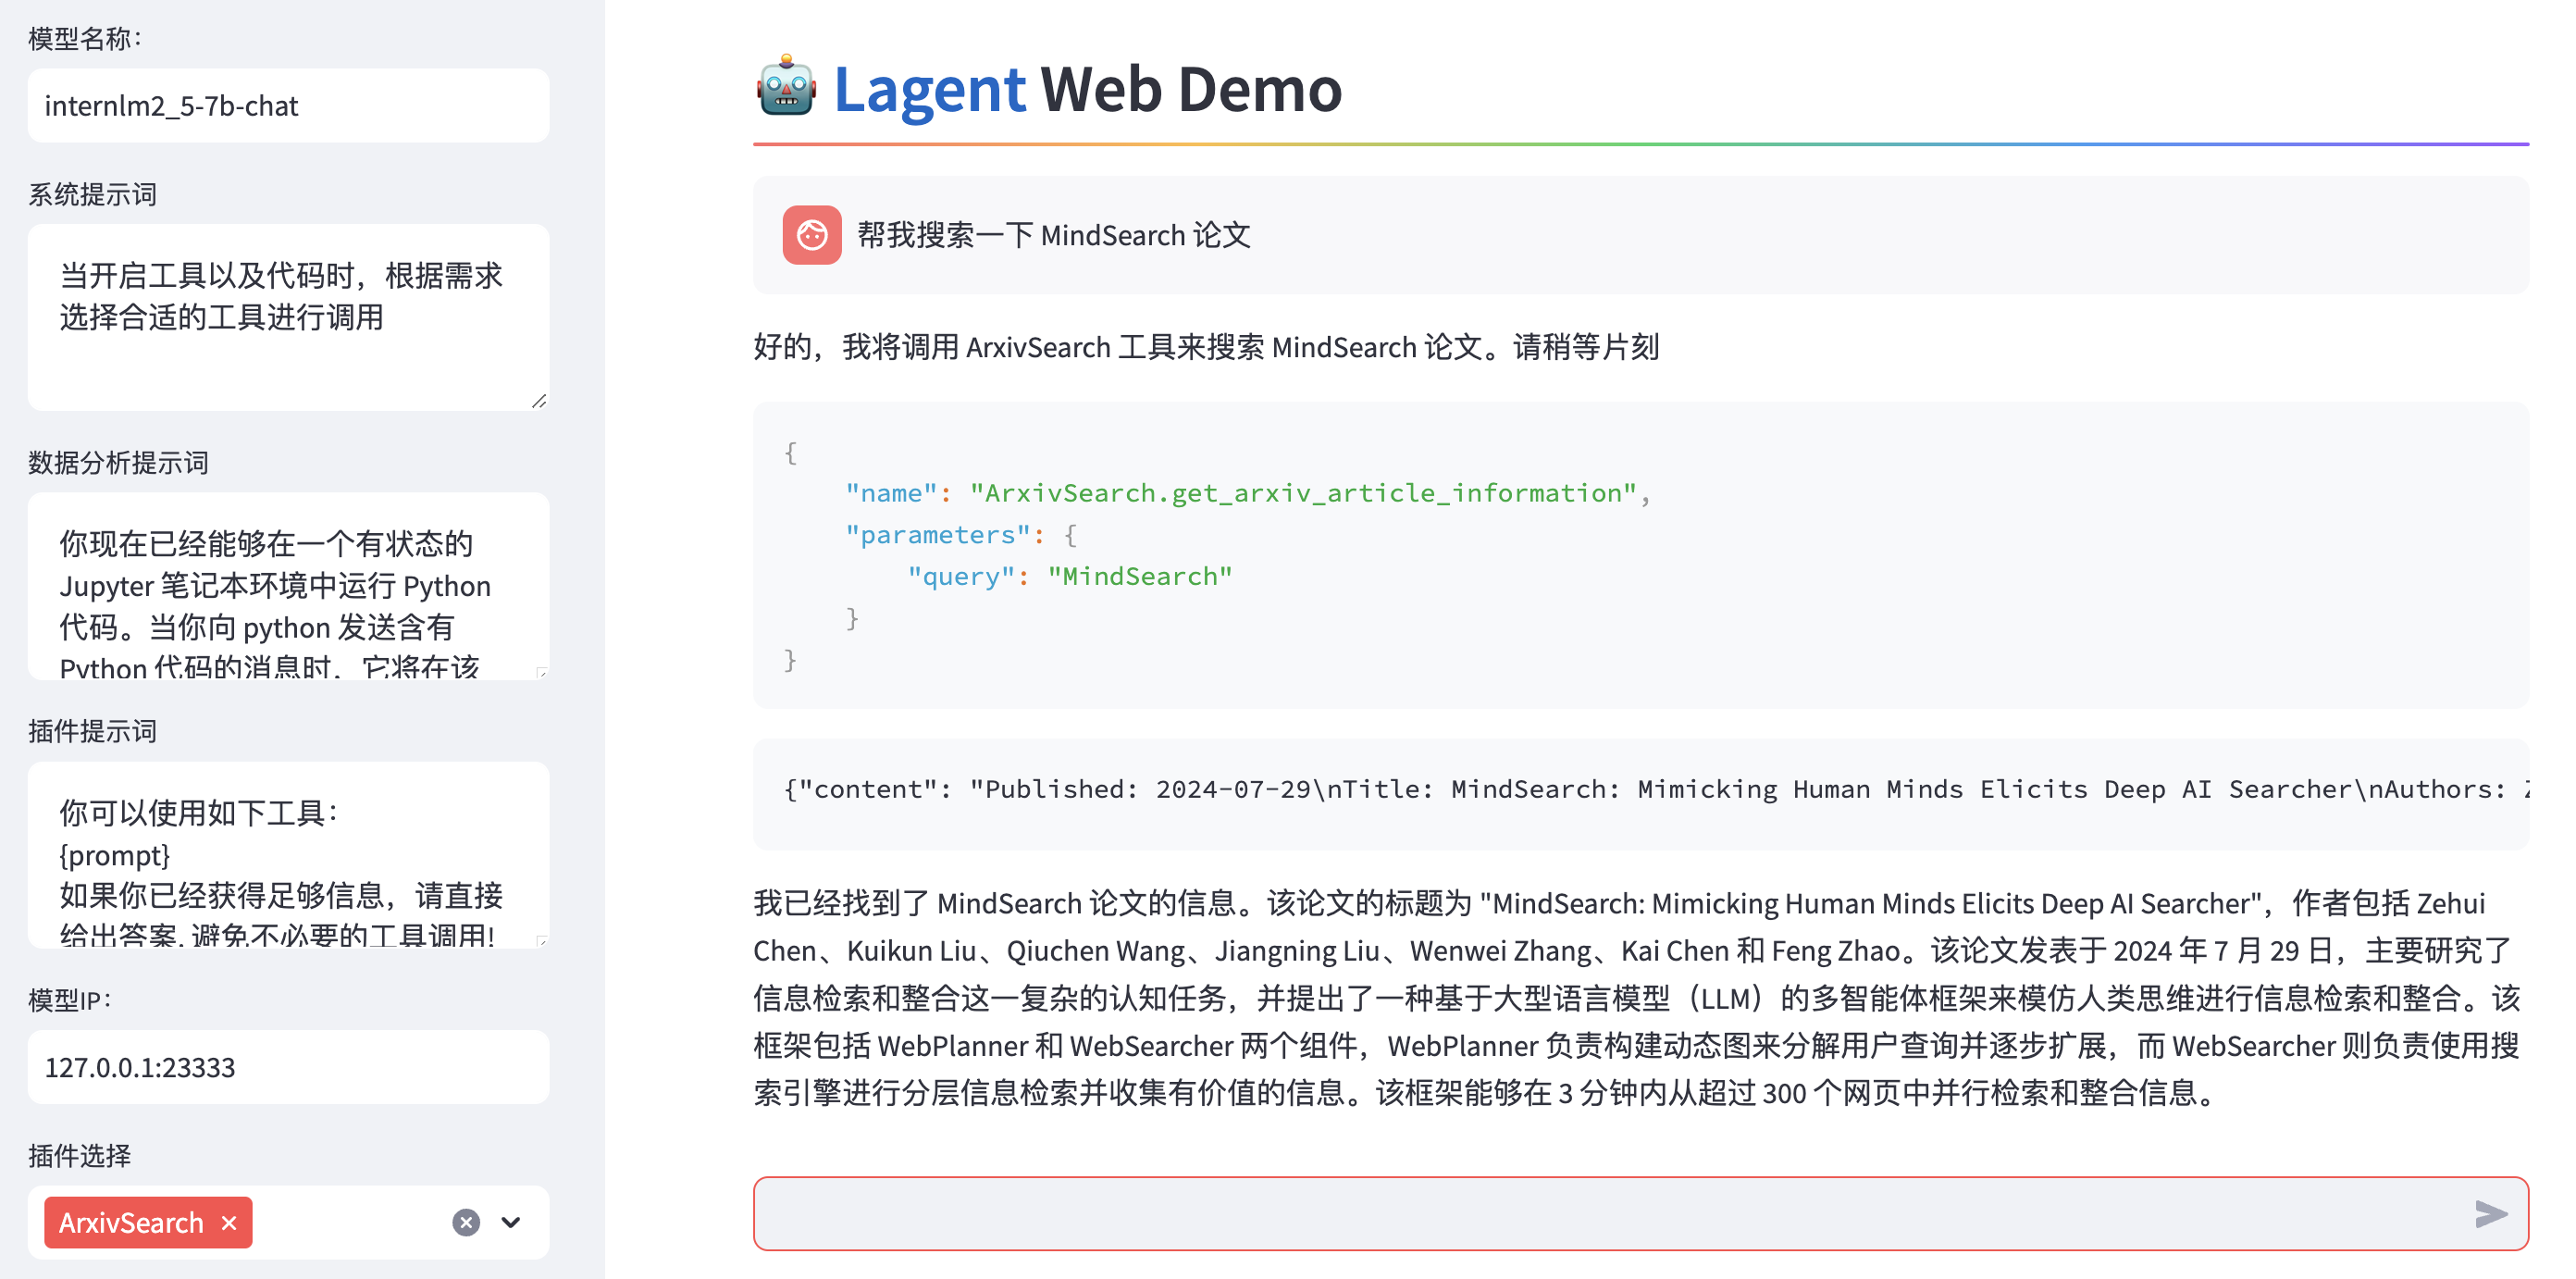
接下来,在本地浏览器中打开 localhost:8501,并修改模型名称一栏为 internlm2_5-7b-chat,修改模型 ip一栏为127.0.0.1:23333。(注意每个地方修改需要按下回车)
然后,我们在插件选择一栏选择 ArxivSearch,并输入指令“帮我搜索一下 MindSearch 论文”,可以看到演示效果如下所示:
4 基于Lagent自定义智能体
动作(actions),也被称为工具,提供了一套LLM驱动的智能体用来与真实世界交互并执行复杂任务的函数。
使用 Lagent 自定义工具主要分为以下几步:
- 继承
BaseAction类 - 实现简单工具的
run方法;或者实现工具包内每个子工具的功能 - 简单工具的
run方法可选被tool_api装饰;工具包内每个子工具的功能都需要被tool_api装饰
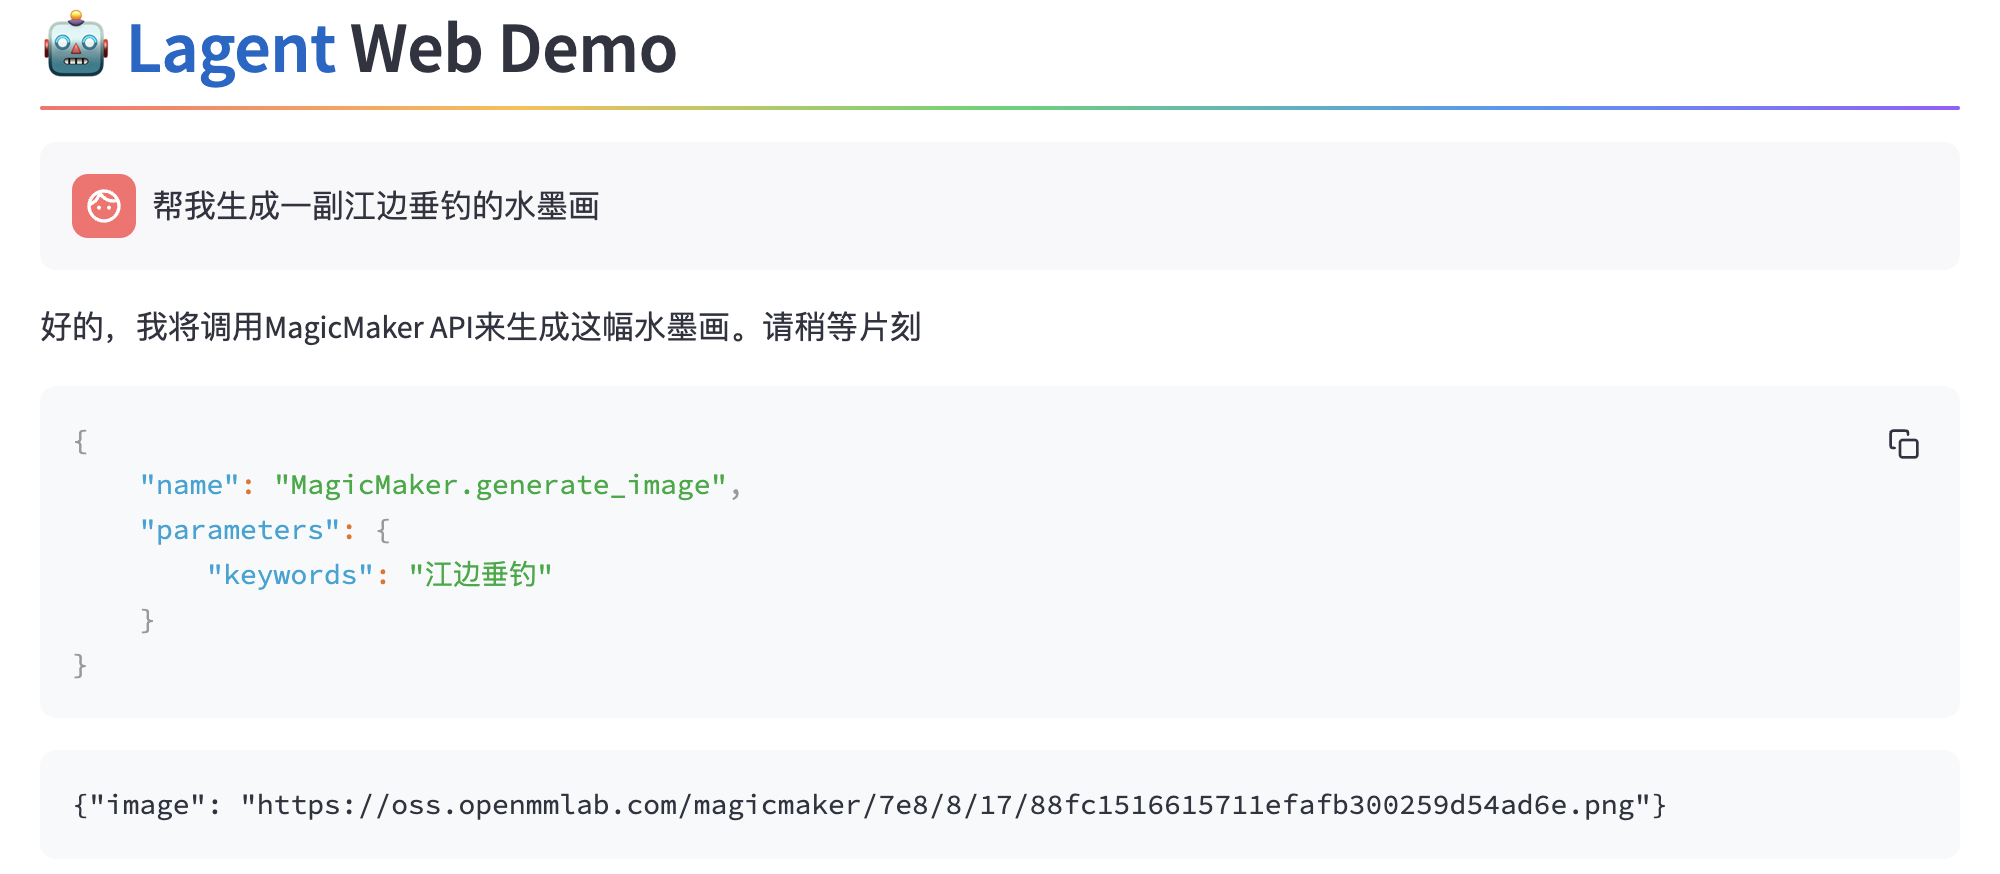
接下来我们将尝试实现一个调用 MagicMaker API 以完成文生图的功能。
详细的lagent知识介绍请参考官方文档:动作 — Lagent
先创建一个工具文件:
cd /root/agent_camp3/lagent
touch lagent/actions/magicmaker.py
并放入如下代码:
import json
import requests

from lagent.actions.base_action import BaseAction, tool_api
from lagent.actions.parser import BaseParser, JsonParser
from lagent.schema import ActionReturn, ActionStatusCode


class MagicMaker(BaseAction):
    styles_option = [
        'dongman',  # 动漫
        'guofeng',  # 国风
        'xieshi',   # 写实
        'youhua',   # 油画
        'manghe',   # 盲盒
    ]
    aspect_ratio_options = [
        '16:9', '4:3', '3:2', '1:1',
        '2:3', '3:4', '9:16'
    ]

    def __init__(self,
                 style='guofeng',
                 aspect_ratio='4:3'):
        super().__init__()
        if style in self.styles_option:
            self.style = style
        else:
            raise ValueError(f'The style must be one of {self.styles_option}')

        if aspect_ratio in self.aspect_ratio_options:
            self.aspect_ratio = aspect_ratio
        else:
            raise ValueError(f'The aspect ratio must be one of {aspect_ratio}')

    @tool_api
    def generate_image(self, keywords: str) -> dict:
        """Run magicmaker and get the generated image according to the keywords.

        Args:
            keywords (:class:`str`): the keywords to generate image

        Returns:
            :class:`dict`: the generated image
                * image (str): path to the generated image
        """
        try:
            response = requests.post(
                url='https://magicmaker.openxlab.org.cn/gw/edit-anything/api/v1/bff/sd/generate',
                data=json.dumps({
                    "official": True,
                    "prompt": keywords,
                    "style": self.style,
                    "poseT": False,
                    "aspectRatio": self.aspect_ratio
                }),
                headers={'content-type': 'application/json'}
            )
        except Exception as exc:
            return ActionReturn(
                errmsg=f'MagicMaker exception: {exc}',
                state=ActionStatusCode.HTTP_ERROR)
        image_url = response.json()['data']['imgUrl']
return {'image': image_url}代码中,首先定义了一个MagicMaker类,并继承了BaseAction类,类中主要定义了两个参数,即图片比例和图片风格,并实现一个工具接口函数generate_image,用于基于参数生成图片。
然后,我们需要修改 /root/agent_camp3/lagent/examples/internlm2_agent_web_demo.py 来引入我们的自定义工具:
- 在
from lagent.actions import ActionExecutor, ArxivSearch, IPythonInterpreter的下一行添加from lagent.actions.magicmaker import MagicMaker - 在第27行添加
MagicMaker()。
之后重新运行web demo,就可以在左下角插件中找到我们自定义的插件。我们尝试让他生成一副江边垂钓的水墨画,我们可以看到效果如下: